Why Pictures of Cannabis Plants Are Worth More Than Nutrient Charts
When a grower says "something looks off," that instinct almost always comes from a visual reference — either a picture they've seen before, or a mental library built from grows they've done themselves. Pictures of cannabis plants at known, healthy stages are one of the most practical diagnostic tools you have. They let you compare, contrast, and catch deviations before a small problem becomes a lost yield. Across more than 1,000 grow journals tracked on Grow Guide — 735 of which are indoor grows — the most common troubleshooting pattern is growers who didn't recognize a problem because they didn't have a clear visual baseline for what "right" looks like.
This guide gives you that baseline. Stage by stage, with specific day counts, measurable environmental targets, and the visual red flags that appear in almost every problematic grow.
Stage 1: Germination and Seedling (Days 1–14)
What Healthy Seedlings Look Like in Pictures
At day 1–3 post-germination, the taproot is white, firm, and between 0.5–2cm. The seed shell may still be attached to the cotyledons — the two round "seed leaves" — and that's fine for up to 48 hours. By day 5–7, the first true set of single-finger leaves appears. By day 10–14, you should see the second node developing with the first serrated cannabis leaves. Stem is upright, not stretching, and the cotyledons are a uniform pale green, transitioning to a deeper green as chlorophyll production ramps up.
Visual red flags at seedling stage:
- Stretching: more than 3–4cm of bare stem below the cotyledons means light is too far away — move it to within 20–30cm for fluorescent or raise PPFD to 200–300 µmol/m²/s
- Damping off: a pinched, dark, wet-looking stem at soil level — caused by overwatering or poor airflow
- Yellow cotyledons before day 10: often pH imbalance, check runoff pH (target 6.0–7.0 in soil, 5.8–6.2 in coco)
- Clawing or curling of the first true leaves: nitrogen toxicity from hot soil, or heat stress above 28°C
Stage 2: Vegetative Growth (Days 14–49)
Pictures of Healthy Veg Cannabis: What You're Looking For
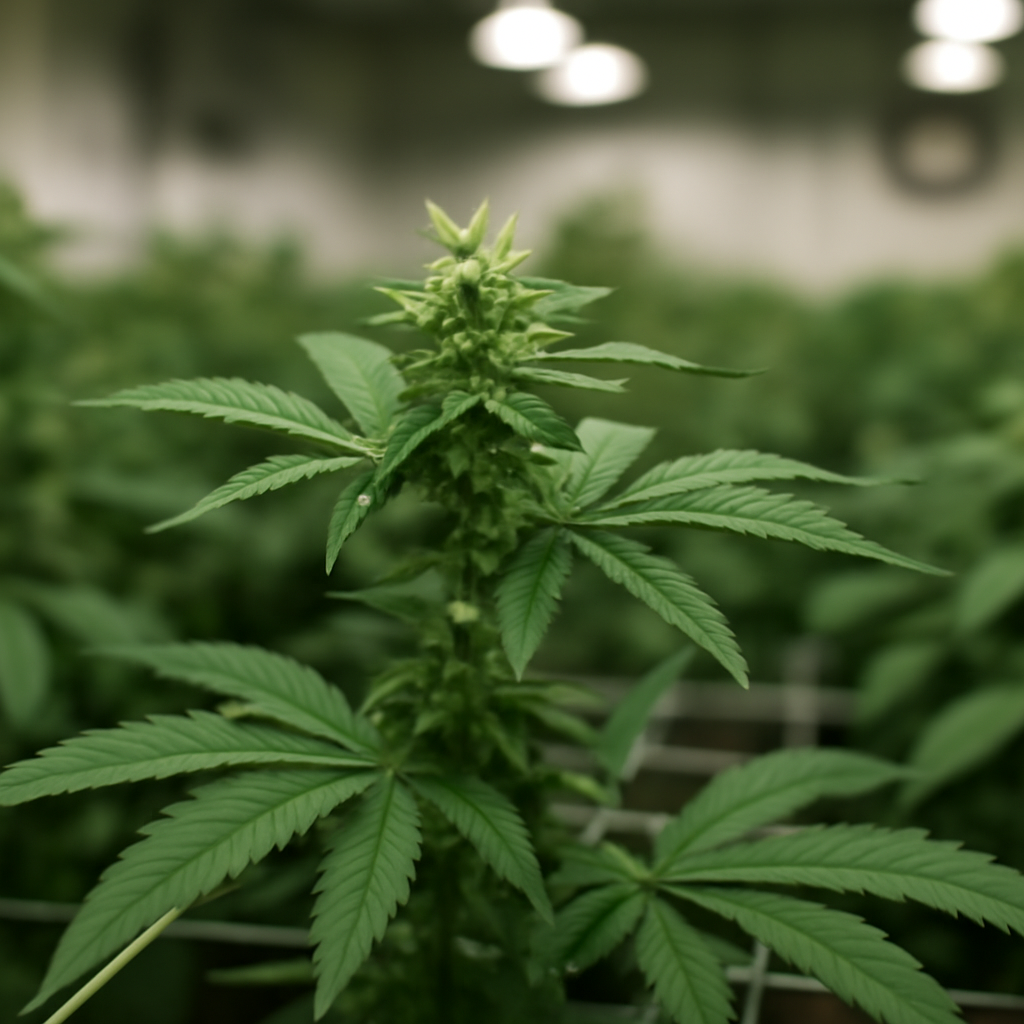
Vegetative cannabis should look vigorous and symmetrical. Fan leaves are wide, dark green, and show clear alternating node development after week 3. Internodal spacing is tight — ideally 3–6cm between nodes — which signals the plant is getting adequate light (target 400–600 µmol/m²/s PPFD). Stems are thick and slightly purple or red-tinged in some genetics, which is normal. Root zone is white and firm if you can see it through a clear container.
By week 3–4 of veg, you can sex most feminized plants visually: pre-flowers (small, white pistil pairs at the internodes) confirm female genetics. Structural training — topping, LST, fimming — is done in this window. If you're considering either approach, the Fimming vs Topping guide has a clear visual breakdown of what each technique looks like post-cut.
Visual red flags in veg:
- Light green or yellow new growth: iron or sulfur deficiency — check pH first, then supplement if pH is in range
- Dark, waxy, claw-curling leaves: nitrogen toxicity — back off nitrogen by 25–30% and check EC (target 1.0–1.8 mS/cm in veg)
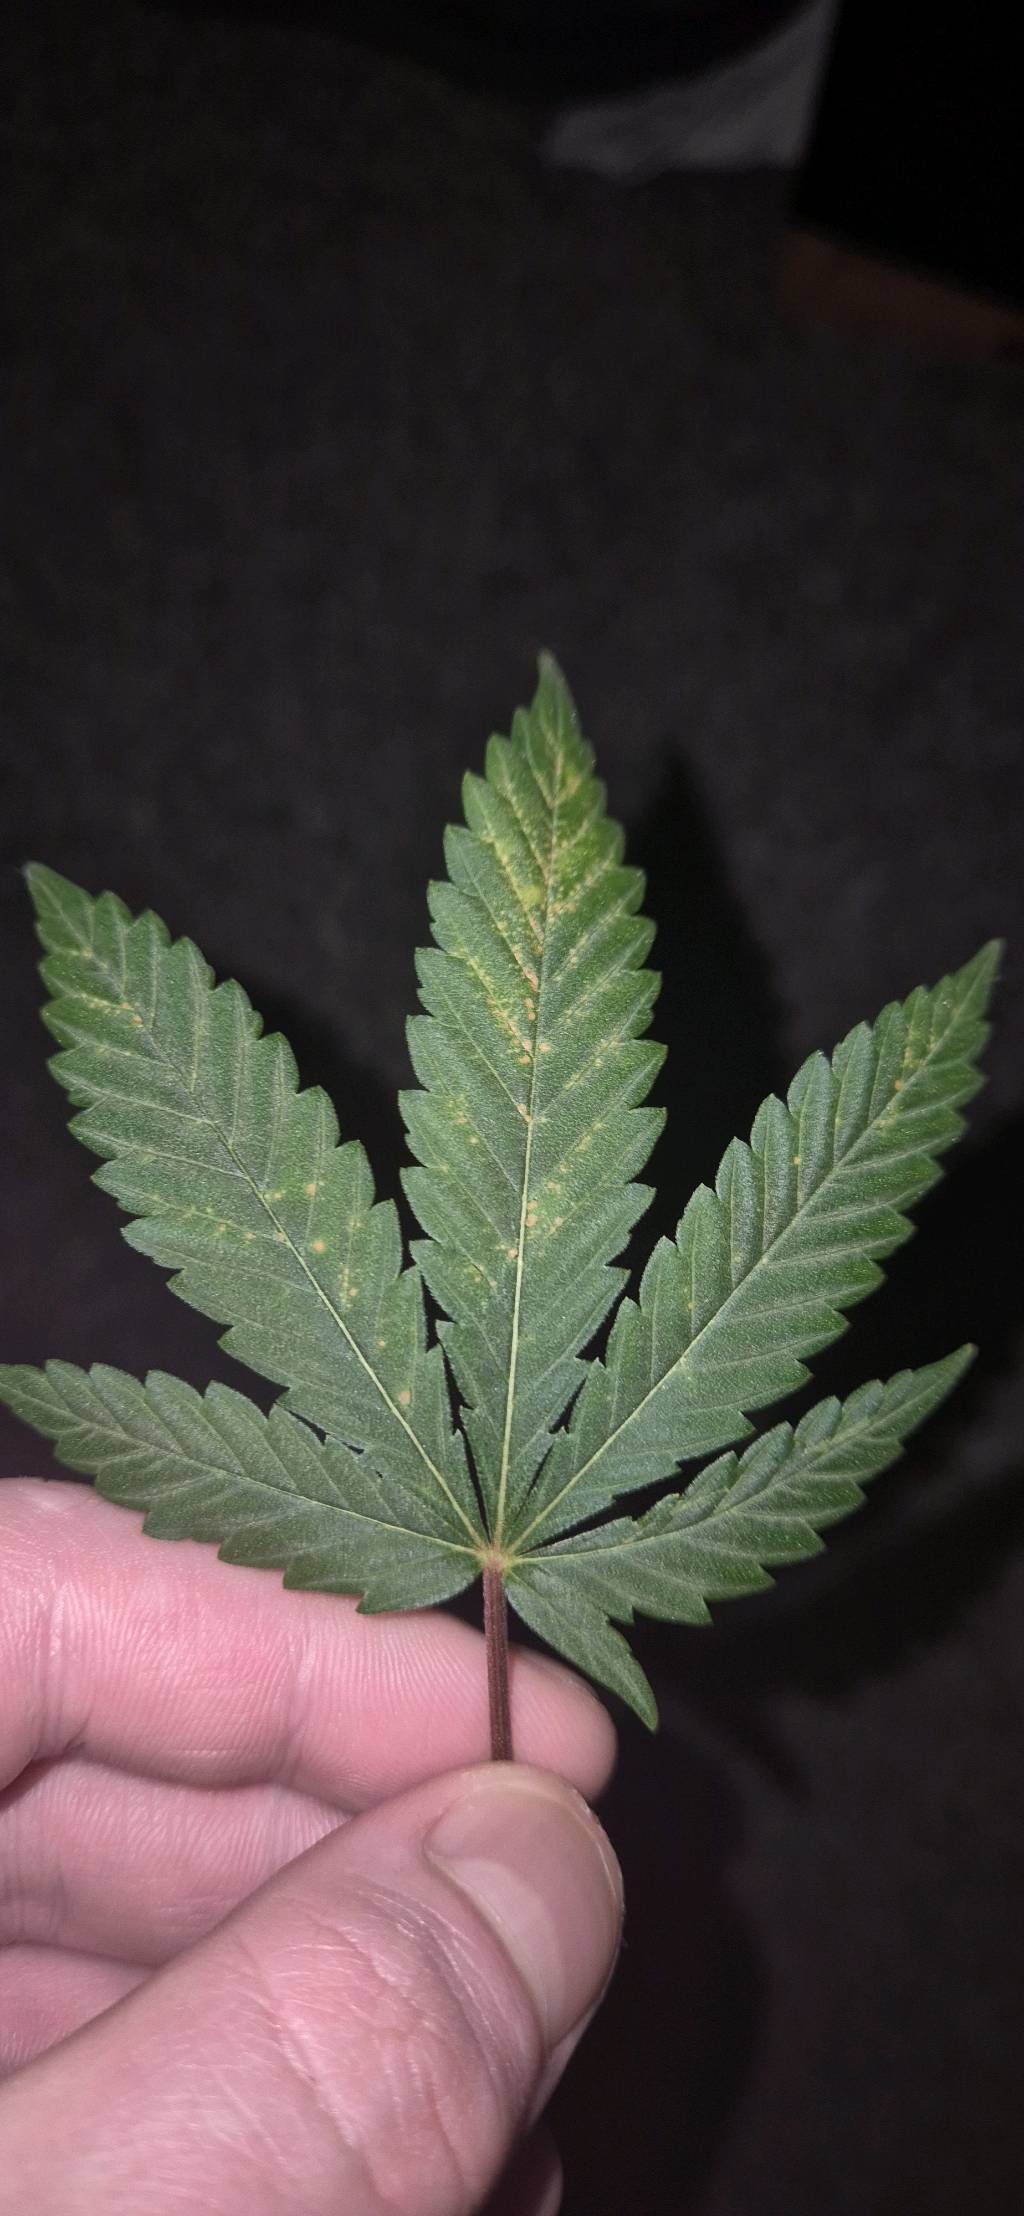
- Spots on older leaves: calcium or magnesium deficiency — very common in coco coir grows, supplement at 50–100ppm Ca, 25–50ppm Mg
- Elongated internodes: light is too far, raise PPFD or lower fixture
Use the Nutrient Deficiency Identifier if you're seeing spots, discoloration, or curl and can't pinpoint the cause — it walks through the visual symptoms systematically.
Stage 3: Flower Development (Days 49–112)
What Cannabis Looks Like Week by Week in Flower
Flower is the stage where pictures of cannabis plants look most dramatic — and where visual diagnosis becomes most critical. Here's a week-by-week breakdown of what you should see:
- Week 1–2 (Transition/Stretch): White pistils emerge at every bract site. Plants stretch 50–100% of their pre-flip height. Leaves are still deep green, calyxes forming but small.
- Week 3–4: Buds are stacking, calyxes swelling. Trichomes are forming — under a 60x loupe they appear clear and short-stalked. Pistils are mostly white. Fan leaves may begin yellowing slightly — this is normal senescence, not deficiency, if it starts from the bottom up.
- Week 5–6: Buds are dense and resinous. Trichomes are predominantly clear to milky. This is where bud swell is most rapid — maintain PPFD at 700–900 µmol/m²/s and keep VPD between 1.0–1.4 kPa. Drop RH to 45–50% to prevent botrytis (bud rot).
- Week 7–9: Trichomes transitioning from milky white to amber. Pistils turning orange-red. Calyxes are fully swollen. Fan leaves yellowing more aggressively — this is the plant cannibalizing its own nitrogen stores, a sign of approaching maturity.
- Week 9–11+: Harvest window. See below.
Harvest Window: Reading the Visual Signals
The two main visual cues for harvest timing are trichome color and pistil color — and you need both to make a reliable call. Relying on a single indicator leads to early or late harvests, both of which hit potency and flavor hard.
Pistil read: When 70–80% of pistils have turned from white to orange-red and curled inward, the plant is in the harvest window. At 90–100%, you're on the late side and likely seeing some THC degradation.
Trichome read: Use a 60x–100x jeweler's loupe or digital microscope. At peak THC, trichomes are predominantly milky white with 0–20% amber. If you prefer a more sedative effect, wait for 20–30% amber. Clear trichomes mean underdeveloped cannabinoids — don't harvest yet.
Plan your harvest window with the Grow Schedule Planner, which helps you map backwards from a target date to hit your optimal flush, dark period, and chop day.
Post-Harvest: What Good Drying and Curing Looks Like
Drying: Pictures vs Reality
Freshly harvested cannabis contains roughly 80% water by weight. Your target after drying is 11–12% moisture content. Visually, correctly dried buds have a slightly matte surface (not wet or shiny), stems snap rather than bend, and the exterior feels dry to the touch without the interior being crumbly or dusty. The smell shifts from sharp and vegetal to a cleaner, more pronounced terpene expression. Dry in a dark room at 15–21°C with 55–60% RH for 7–10 days.
Red flags during dry:
- White fuzzy patches: botrytis or powdery mildew — increase airflow immediately, remove affected material
- Buds drying in under 5 days: environment is too warm or dry — terpenes are escaping, slow it down
- No scent change after 10 days: humidity may be too high, extend dry time or lower RH to 50%
Curing: The Visual Tell of a Proper Cure
Properly cured cannabis in glass jars looks dense and slightly sticky without being wet. Buds hold their structure rather than crumbling when handled. When you open the jar after 48–72 hours of curing, the smell is richer and more complex than at the point of jarring — this is terpene maturation happening. After 2–3 weeks of daily "burping" (opening jars for 5–15 minutes to release CO₂ and excess moisture), the smell transitions fully. At 4–8 weeks, the chlorophyll breakdown is complete and the smoke is smooth with a pronounced flavor profile.
The Dry & Cure Timer tracks your exact dry and cure days, with burping reminders so you don't skip the daily ventilation that prevents mold in sealed jars.
Using Your Own Grow Pictures as a Diagnostic Tool
How to Document Grows for Maximum Visual Value
The most useful pictures of cannabis plants are ones you take yourself, consistently, across every stage of your specific grow. Grow Guide's journal tools let you attach photos to each daily entry — over 1,000 growers on the platform already do this, and it creates a searchable visual timeline you can compare grow-to-grow. The pattern recognition you build from your own documented grows is irreplaceable.
For maximum diagnostic value, take photos in consistent lighting — not in blurple LED light which distorts color and makes yellowing invisible. Natural white light or a phone flash gives true color rendition. Get close-ups of problem leaves alongside whole-plant shots for context. Log the photo alongside your EC, pH, and environmental data using the Cannabis Grow Diary guide so you can correlate visual changes with measurable conditions.
Photo checklist per weekly entry:
- Full plant shot (shows structure, height, node spacing)
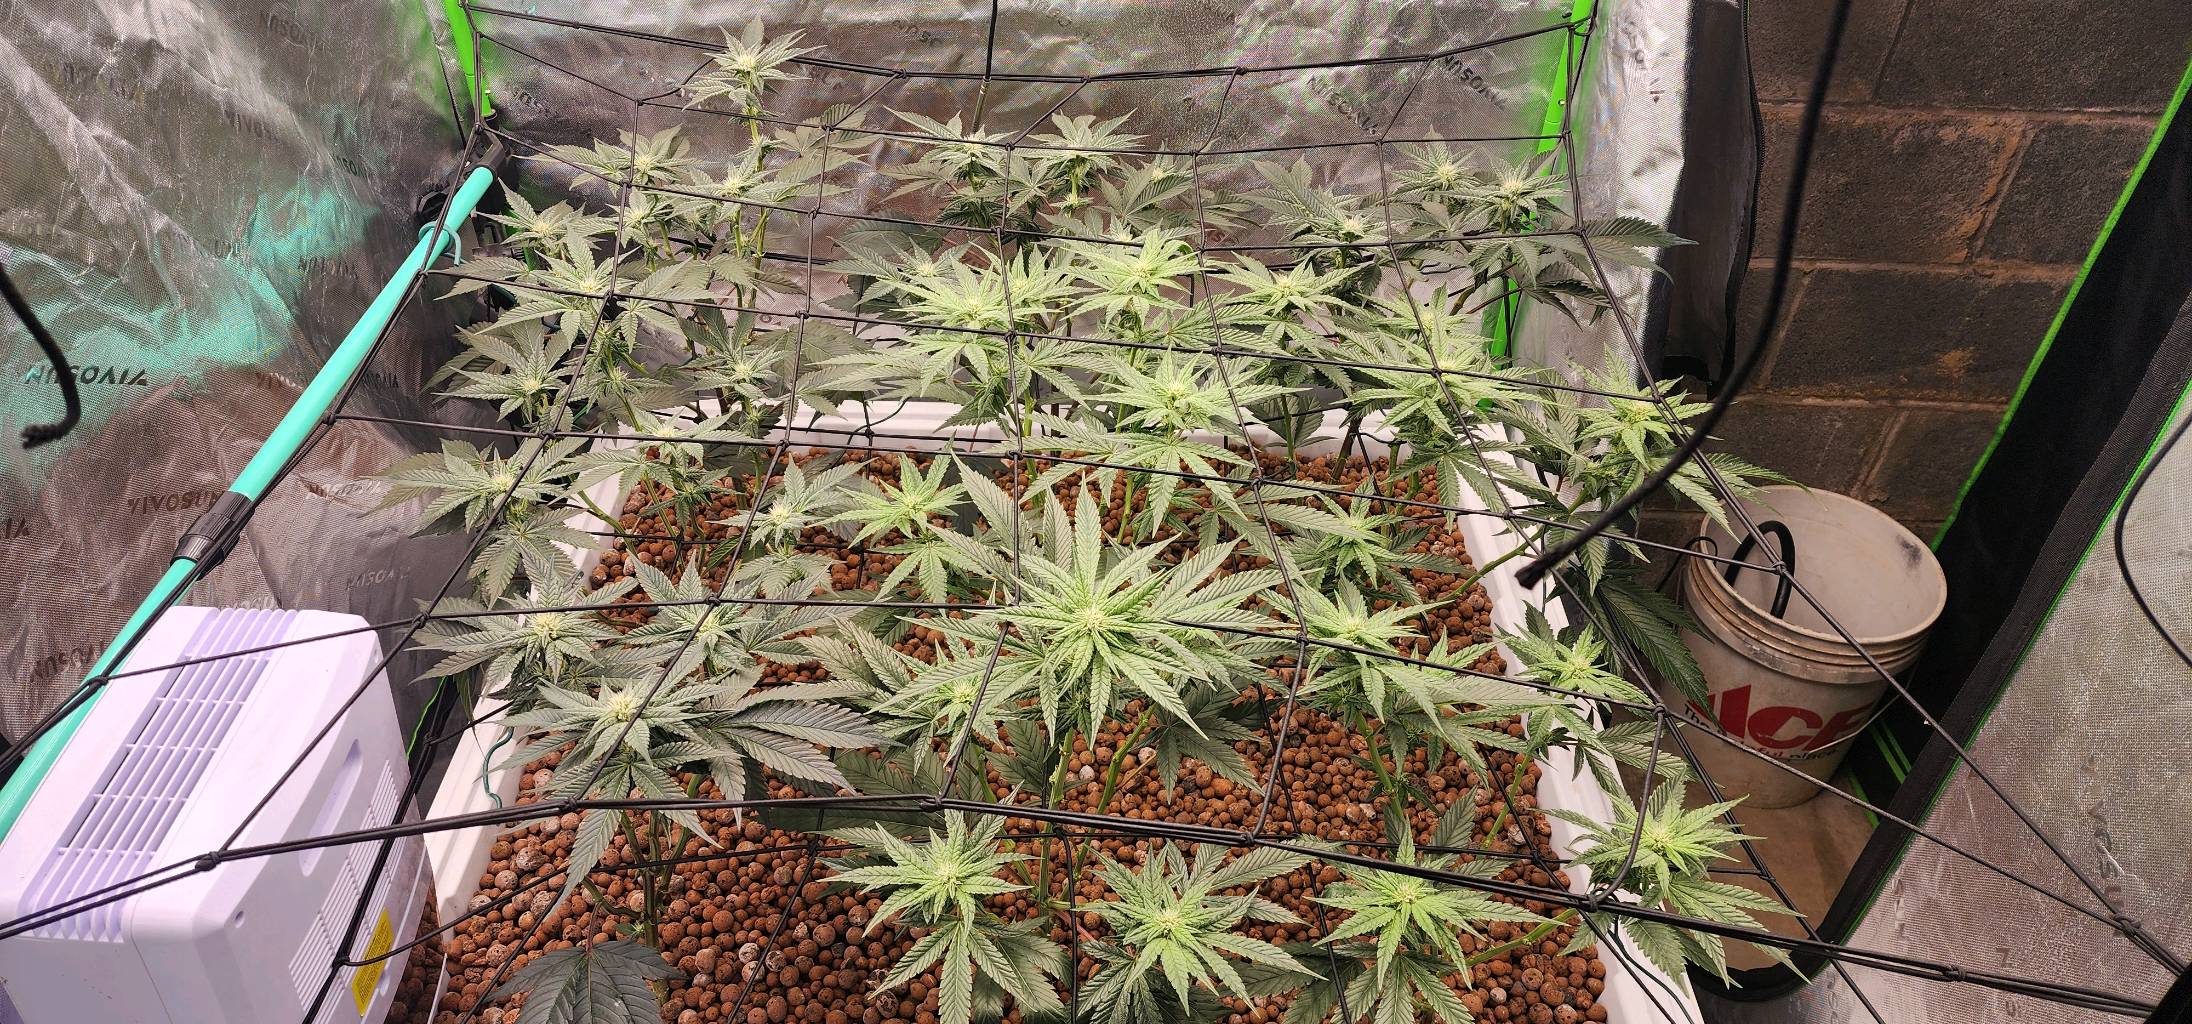
- Canopy top-down (shows light penetration and even growth)
- Underside of newest growth (shows pest evidence, new deficiency signs)
- Any abnormal leaves, close-up with white balance corrected
- Trichome shot (from week 5 of flower onward, every 3–4 days)
If you're tracking yield across grows, the Yield Calculator helps you connect your environmental and training decisions — visible in your grow pictures — to actual gram output over time.
Common Deficiencies That Show Up Clearly in Pictures
Approximately 70% of new growers hit a nutrient or environmental problem in their first grow — and most of them are diagnosable by visual symptoms alone if you know what you're looking for. Here are the most photographed, most common issues:
- Nitrogen deficiency: Yellowing starts on the lowest, oldest fan leaves and moves upward. Entire leaf yellows uniformly. Fix: increase nitrogen in feed, check pH is allowing N uptake (soil: 6.2–6.8; coco: 5.8–6.2).
- Calcium deficiency: Brown spots with yellow halos on mid-canopy leaves. Spots are irregular, not on leaf edges. Fix: supplement calcium at 100–150ppm, lower pH slightly if in coco.
- Phosphorus deficiency: Purple-red coloration on the underside of fan leaves, starting mid-canopy. Fix: ensure temps above 18°C (cold roots block P uptake), supplement if needed.
- Overwatering: Not a nutrient issue but looks like one — entire plant droops with leaves pointing slightly downward, even when soil EC and pH are correct. Lift the pot — if it's heavy, wait.
- Light burn: Yellowing and bleaching at the very top of the canopy closest to the fixture, while lower leaves stay green. Raise your light or reduce intensity.
The Nutrient Deficiency Identifier uses your described visual symptoms to narrow down the likely cause and suggest a fix — useful when you have a picture but can't identify what you're looking at.
Frequently Asked Questions
What do healthy cannabis leaves look like compared to deficient ones?
Healthy cannabis leaves are deep green, flat, and show no spots, curling, or discoloration. Deficient leaves show specific patterns depending on the missing nutrient — nitrogen deficiency turns older leaves uniformly yellow from the bottom up, while calcium deficiency creates brown spots with yellow halos mid-canopy. Always photograph in white light, not grow light, for accurate color assessment.
How often should I take pictures of my cannabis plants?
At minimum, take photos weekly with a consistent angle and lighting — this gives you a reliable before-and-after baseline. During flowering from week 5 onward, add trichome close-ups every 3–4 days to track ripeness progression accurately.
What do trichomes look like when it's time to harvest?
Under a 60x–100x loupe, harvest-ready trichomes appear milky white with 10–20% amber — clear trichomes mean THC hasn't peaked yet. Most growers target 70–80% milky and 10–20% amber for balanced potency; waiting for 30%+ amber increases sedative effect as THC degrades into CBN.
Why do my cannabis pictures look different under grow lights vs natural light?
Blurple LED lights (combining red and blue spectrums) distort color rendition significantly, making yellowing and deficiency symptoms nearly invisible in photos. Always take diagnostic photos under white light — a single white LED, natural daylight, or phone flash — for accurate color that matches what you'd see in a grow guide or deficiency chart.
What should cured cannabis look like in the jar?
After a proper cure, buds should be slightly sticky, hold their structure without crumbling, and have a rich, complex smell when the jar is opened. The surface should be matte rather than wet or shiny. White fuzzy patches on any bud indicate mold — remove affected material immediately and increase ventilation and burping frequency.
References
- Wikipedia Contributors (2026). Cannabis cultivation. Wikipedia. Covers harvest timing indicators including trichome color and pistil development, and environmental targets for humidity (40–60% RH) and temperature (70–85°F). en.wikipedia.org/wiki/Cannabis_cultivation
- Casiraghi, A. et al. (2022). Post-harvest processing of cannabis: A systematic review. PMC / NCBI. Documents that freshly harvested cannabis contains ~80% water and that proper drying to ~11% moisture content is critical for preserving cannabinoids and terpenes. pmc.ncbi.nlm.nih.gov/articles/PMC8911901/
- Advanced Nutrients (2026). Cannabis Cultivation Strategies: CannaEd Summit. Highlights that many fertilizers repurposed from general agriculture can create excessive phosphorus and incorrect cation-anion ratios in cannabis grows, impacting nutrient uptake and visual plant health. advancednutrients.com
- The Seed Connect (2026). Common Cannabis Growing Mistakes: How to Avoid Them. Reports that approximately 70% of new growers encounter problems in their first cultivation cycle, predominantly due to nutrient mismanagement, overwatering, and failure to monitor EC and pH levels. theseedconnect.com
- PR Newswire (2026). 2026 Outlook: Cannabis Industry Matures Despite Challenges — Cultivation and Post-Harvest Tech Take Center Stage. Documents 2026 industry trends including increased adoption of post-harvest drying and curing technologies and the impact of anticipated cannabis rescheduling on cultivator operations. prnewswire.com