Learning how to grow one cannabis plant indoors is the most efficient way to dial in your skills before scaling up. One plant means one set of variables to control, one pot to water, one light to tune — and when something goes wrong, you catch it fast. This guide walks you through every stage from seed to cured jar, with exact numbers, timings, and the mistakes that trip up most first-time growers.
What You Need Before You Start
For a single plant, a 2×2 ft grow tent is your best setup. It's big enough for a productive canopy, small enough to heat and humidify without effort. Here's the minimum equipment list:
- Tent: 2×2×4 ft (AC Infinity, Vivosun, or similar)
- Light: 100–200W LED — Spider Farmer SF-2000 (~$200) is a proven budget option; HLG Scorpion Diablo (~$700) if you want premium output
- Exhaust fan: 4-inch inline fan with carbon filter for odor control
- Oscillating clip fan: For stem strengthening and canopy airflow
- Containers: 3-gallon fabric pot for soil; 5-gallon if you want a longer veg
- Medium: Pre-amended living soil (Gaia Green, Nature's Living Soil) or coco coir + perlite (70/30)
- pH/EC meter: Apera PH20 and a basic EC pen — non-negotiable
- Thermometer/hygrometer: Inkbird or Govee with logging
Before you germinate a single seed, use the Grow Guide light calculator to confirm your LED covers your 2×2 canopy at the right PPFD for each stage. Underpowered light is the #1 reason for airy buds in small tents.
Step-by-Step: How to Grow One Cannabis Plant Indoors
Step 1 — Germinate Your Seed (Days 1–7)
- Drop your seed into a glass of room-temperature water (pH 6.5). Wait 6–12 hours until it sinks.
- Transfer to a damp paper towel folded between two plates. Keep at 75–80°F.
- Check every 12 hours. A taproot of 0.5–1 cm is your green light to plant — usually within 24–72 hours.
- Plant taproot-down, 1 cm deep, in a moist seedling plug or directly in your medium.
- Cover loosely with a humidity dome. Target 70–80% RH, 75–80°F.
Mistake to avoid: Don't drown the seed in standing water for more than 24 hours. If it floats past 12 hours, gently push it under and check every few hours.
Step 2 — Seedling Stage (Days 7–21)
- Once the cotyledons open and the first true leaves appear, remove the dome.
- Set your LED to 18/6 light schedule. Start at 200–300 PPFD (light at 24–30 inches above canopy).
- Water sparingly — a few milliliters around the stem twice daily. The medium should dry out between waterings.
- No nutrients yet if you're in pre-amended soil. In coco, start at EC 0.4–0.6 with seedling-strength feed from day 10.
- Target VPD: 0.4–0.8 kPa. Temperature 72–78°F, humidity 60–70%.
Mistake to avoid: Overwatering kills more seedlings than anything else. If the pot feels heavy, wait. Pick it up — a dry pot is noticeably lighter than a saturated one.
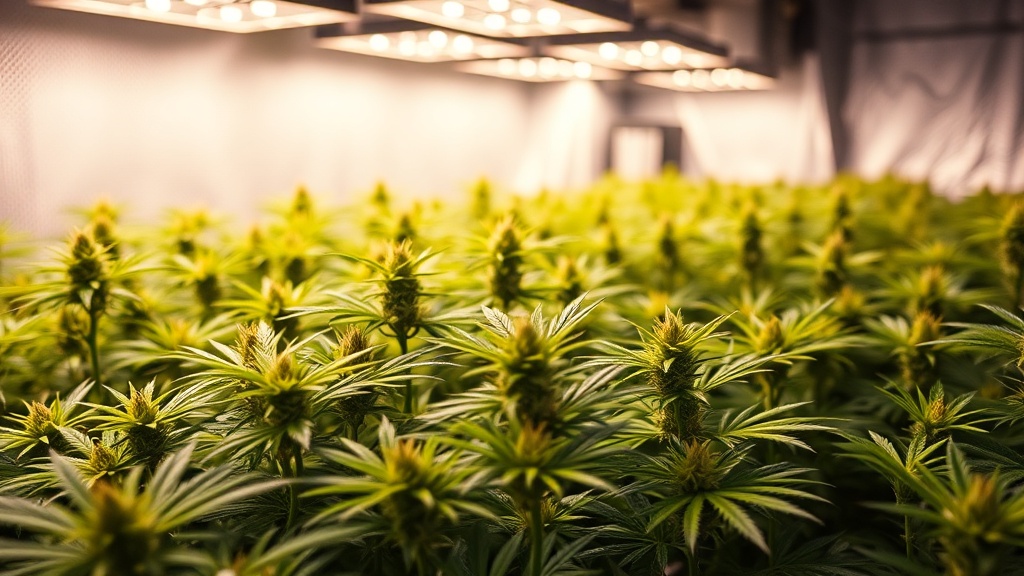
Step 3 — Vegetative Growth (Weeks 3–8)
- Maintain 18/6 light. Ramp PPFD up to 400–600 PPFD by week 4, 600–800 PPFD by week 6.
- Begin nutrients at veg strength: nitrogen-forward formula. In coco, target EC 1.2–1.8. In soil, feed every second watering.
- Keep pH at 6.0–7.0 for soil, 5.8–6.2 for coco/hydro. pH drift causes most nutrient lockout issues.
- Introduce low-stress training (LST) at week 4: bend the main stem horizontally and pin it down to spread the canopy. This dramatically increases your final yield from a single plant.
- Aim for a canopy that's wide, not tall — you want a flat, even plane of bud sites.
- Target VPD: 0.8–1.2 kPa. Temperature 72–82°F, humidity 50–65%.
- Flip to flower when the plant is half the final height you want — it will stretch 50–100% in early flower.
Use the Grow Guide schedule planner to map out your veg-to-flower flip date based on your tent height and chosen strain. For a 2×2, most growers flip at 4–5 weeks of veg.
Mistake to avoid: Vegging too long in a small tent. If your plant hits the light, you lose yield. Flip early and train aggressively rather than vegging late.
Step 4 — Flowering Stage (Weeks 8–16)
- Switch your timer to 12 hours on / 12 hours off. The dark period must be completely uninterrupted — any light leak resets the flower trigger.
- Expect a stretch of 50–100% in the first 3 weeks. Adjust light height daily if needed to maintain 18–24 inches above the canopy.
- Increase PPFD to 600–900 PPFD in early flower, 800–1000 PPFD in mid/late flower. Don't push past 1000 PPFD without CO₂ supplementation — you'll hit the light saturation point.
- Switch nutrients to a phosphorus/potassium-forward formula. In coco, target EC 1.6–2.2. Drop nitrogen significantly from week 4 of flower onward.
- Run a 2-week flush (water only, pH'd to 6.0–6.5) before harvest if you're in soil — or from day 50 in coco.
- Drop humidity to 40–50% RH in late flower to prevent bud rot. This is the most critical environmental adjustment of the entire grow.
- Add a second oscillating fan if buds are dense. Airflow through the canopy is your best defense against botrytis.
If leaves start showing unusual colors or spots mid-flower, use the Grow Guide nutrient deficiency identifier to diagnose before you overcorrect with extra feed.
Mistake to avoid: Harvesting too early. Most growers pull at 7–8 weeks when the strain needs 9–10. Patience here directly equals potency and yield.
Step 5 — Reading Harvest Timing
- At around week 7–8 of flower, get a jeweler's loupe (30–60x) or digital microscope and check trichomes on the buds — not the sugar leaves.
- Clear trichomes: Too early. Not yet.
- Milky/cloudy trichomes: Peak THC, energetic effect. Harvest window is open.
- Amber trichomes (10–20%): Slightly degraded THC to CBN, more sedative. Most growers target 10–15% amber for a balanced effect.
- Also check pistil color: 70–90% of white pistils darkened to orange/red is a reliable secondary indicator.
- Stop all nutrients 10–14 days before harvest. Water with pH-balanced water only.
Want to estimate what your single plant will yield before you chop? Run your numbers through the Grow Guide yield calculator — input your light wattage, canopy size, and training method for a realistic gram estimate.
Step 6 — Harvest, Dry, and Cure
- Harvest: Cut branches cleanly with sanitized scissors or pruning shears. Trim fan leaves immediately (wet trim) or leave them on and trim after drying (dry trim — preserves trichomes better).
- Hang to dry: Hang branches upside down in a dark space at 60–65°F and 55–60% RH. Slower is better — aim for 10–14 days minimum. Stems should snap, not bend, before you jar.
- Jar up: Fill wide-mouth mason jars to 70% capacity. Pack any tighter and you trap moisture. Any looser and you oxidize the buds faster.
- Burp daily (weeks 1–2): Open each jar for 15–20 minutes every 24 hours to release CO₂ and moisture. If you smell ammonia, the buds are too wet — leave lids off for 2–4 hours.
- Burp weekly (weeks 3–8): Reduce burping to once a week. At 4 weeks, the smoke is noticeably smoother. At 8 weeks, terpene complexity peaks.
- Add a Boveda 62% RH pack to each jar after the first 2 weeks to maintain optimal moisture long-term.
Track your dry and cure process precisely with the Grow Guide dry & cure timer — it logs your burp schedule and flags when buds are within safe moisture range.
Mistake to avoid: Rushing the cure. Buds jarred too wet grow mold within days. Buds jarred too dry lose terpenes and never recover their aroma. The 10–14 day slow dry is the insurance policy on all your work.
Troubleshooting: Most Common Problems When Growing One Indoor Plant
Yellowing Leaves
Bottom leaves yellowing in late flower is normal — the plant is pulling nitrogen from old growth into buds. Yellowing in veg or early flower means either nitrogen deficiency (EC too low), pH lockout (check your runoff pH — should be 6.0–7.0 in soil), or overwatering limiting root uptake.
Overwatering
The classic first-timer mistake. Symptoms: drooping leaves that look heavy, not limp; soil that stays wet for 5+ days. Fix: lift the pot — water only when it feels light. In a 3-gallon fabric pot with coco, water daily in flower. In soil, every 2–3 days depending on pot weight.
Light Burn vs. Nutrient Burn
Light burn: top leaves bleach yellow/white, closest to the light, no brown tips. Fix: raise the light. Nutrient burn: crispy brown tips on lower and upper leaves evenly. Fix: flush and reduce EC by 20–30%.
Pests
Spider mites leave stippled yellow dots and fine webbing under leaves — treat immediately with neem oil or spinosad. Fungus gnats live in wet topsoil — let the top 2 inches dry completely and use yellow sticky traps. A single plant is easy to spray thoroughly; catch it in week 1 of veg, not week 6 of flower.
How to Grow One Cannabis Plant Indoors: Expected Yield
A well-trained single plant in a 2×2 under a quality 200W LED — think a strain like Wedding Cake or Gorilla Glue #4 with 5–6 weeks veg and solid LST — realistically produces 2–4 oz (56–112g) dried and cured. Growers hitting 4+ oz are running the full stack: dialed VPD, correct PPFD, clean pH, and a slow 10-day dry. Each of those variables directly adds or subtracts grams from your final jar weight.
The most important thing you can do in 2026 is log everything. Water volume, pH in, EC in, runoff EC, temperatures, VPD. When something goes wrong — and something always does — your journal is how you fix it fast and don't repeat it. Grow Guide's schedule planner keeps all of that in one place so your second grow is measurably better than your first.