Learning how to grow good weed indoors comes down to controlling your environment, feeding your plants correctly, and not rushing the back end. Whether you've got a 2×4 tent or a dedicated grow room, this guide walks you through every stage — seedling to jar — with real numbers and zero filler. Plants in front of you? Let's go.
Step 1: Set Up Your Grow Space
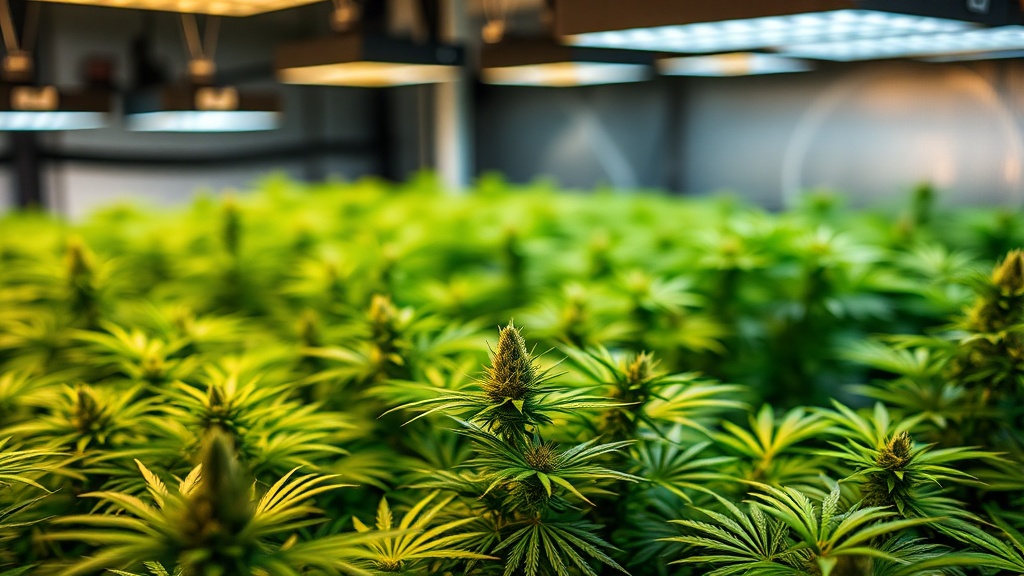
Before a seed goes in the ground, your environment needs to be dialled in. A 2×4 ft (60×120 cm) tent is a solid starting point for 2–4 plants. Line the inside with reflective mylar if it isn't already, and make sure you can seal light leaks completely — even a sliver of light during dark periods causes stress in flower.
- Temperature (lights on): 75–82°F (24–28°C)
- Temperature (lights off): 64–70°F (18–21°C)
- Humidity — veg: 55–70% RH
- Humidity — flower: 40–55% RH (drop to 35–45% in late flower to protect against botrytis)
- VPD target: 0.8–1.0 kPa in veg; 1.2–1.6 kPa in flower
Run an inline fan sized to exchange your tent's air volume every 1–3 minutes. For a 2×4×6 ft tent (~48 cubic feet), that's a 50–150 CFM fan minimum. Add a carbon filter on the exhaust side from day one — not just for odour control, but because it forces you to build proper negative pressure in the tent.
Common mistake: Skipping a temperature/humidity sensor inside the canopy. The reading at the tent wall means nothing. Get a cheap digital hygrometer and clip it at bud level.
Step 2: Choose Your Light and Dial In PPFD
Lighting is the single biggest lever on final yield and quality. In 2026, a quality quantum board LED is the default choice — better efficiency than HPS, less heat, and a full spectrum that works across all stages.
- Seedling / early veg: 200–400 µmol/m²/s PPFD
- Late veg: 400–600 µmol/m²/s PPFD
- Flower: 600–900 µmol/m²/s PPFD (up to 1,200+ with CO₂ supplementation)
Use the Grow Guide light calculator to match your fixture's wattage and beam angle to your canopy size — it'll tell you if you're over- or under-driving your space. A 200W LED over a 2×4 will hit around 700–800 µmol/m²/s at 18 inches — right in the flower sweet spot.
Common mistake: Hanging lights too close during seedling stage. Light burn at day 3 sets you back a week. Start at 24–30 inches and lower gradually.
Step 3: Germinate and Manage the Seedling Stage (Days 1–14)
- Soak seeds in water for 12–24 hours, then move to a damp paper towel folded inside a sealed container. Keep at 77–80°F (25–27°C). Taproot emerges in 24–72 hours.
- Transfer taproot-down into a starter plug (Rapid Rooter or rockwool) or directly into a small solo cup of lightly amended soil.
- Water with plain pH-adjusted water — 6.2–6.5 for soil, 5.8–6.0 for coco — until first true leaves appear. No nutrients yet.
- Keep lights on an 18/6 schedule. Cover with a humidity dome to hold RH near 70% until the seedling is pushing its second node.
Common mistake: Overwatering. At this stage, the root zone is tiny. Water in a small circle around the stem, not the whole pot. Lift the cup — if it feels light, water; if not, wait.
Step 4: Vegetative Growth and Plant Training (Days 14–42)
Veg is where you build the structure that determines your canopy and final yield. Switch to an 18/6 light schedule if you haven't already, and begin nutrients at about 25–50% of the manufacturer's recommended dose, scaling up over 1–2 weeks.
- Soil EC target: 1.0–1.8 mS/cm (runoff)
- Coco/hydro EC target: 1.2–2.0 mS/cm
- pH — soil: 6.0–7.0 (sweet spot: 6.3–6.8)
- pH — coco/hydro: 5.5–6.5 (sweet spot: 5.8–6.2)
Training for Maximum Yield
Start Low-Stress Training (LST) once your plant has 4–5 nodes. Bend the main stem gently outward and tie it down with soft wire or garden clips. This breaks apical dominance and encourages lateral branching — more bud sites, more grams. For a Wedding Cake or similar stretchy hybrid, combine LST with topping at node 4–5 to keep height manageable.
ScrOG (Screen of Green) takes LST further: install a net 12–16 inches above your pots and weave branches through as they grow. Flip to flower when the canopy is 70–80% filled. Use the grow schedule planner to map out your veg timeline against your target harvest date.
Step 5: Flowering (Days 42–98)
Switch your light schedule to 12/12 to trigger flowering in photoperiod plants. The first 2 weeks are pre-flower — you'll see pistils forming but bud structure hasn't developed yet. Weeks 3–6 are the bulk of bud development. Weeks 7+ are ripening.
Push P and K hard in weeks 3–6 — this is when bud structure is being laid down. Pull back nitrogen aggressively at the flip; excess N in flower gives you airy, leafy buds and a harsh smoke. If you're seeing nutrient issues mid-flower, use the nutrient deficiency identifier to pin down what's happening before you start adding things blindly.
Common mistake: Harvesting too early. Most growers chop 1–2 weeks too soon. Buds swell noticeably in the final week. Use a jeweller's loupe or USB microscope to check trichomes — harvest when 70–90% are milky/cloudy with 10–20% amber for a balanced effect, or wait for 20–30% amber for more sedative results.
Step 6: How to Grow Good Weed Indoors — Nailing the Harvest
- Stop feeding 7–10 days before harvest and run plain pH-adjusted water. This helps clear residual salts from the buds (soil growers) or flush the substrate (coco/hydro).
- Do a 48-hour dark period immediately before harvest — lower temps to 65°F (18°C). This is contested in the data, but many growers report denser trichome coverage and deeper colour development.
- Harvest in the dark or under low-intensity green light to minimise UV degradation of trichomes.
- Use clean, sharp scissors or pruning shears. Cut main branches at the base, then trim fan leaves off immediately.
- Decide on wet trim (trim before drying) or dry trim (trim after drying). Dry trimming is generally considered to produce better terpene retention — fan leaves protect the bud during the drying process.
Use the yield calculator after harvest to log your wet weight and project your dry yield — typical dry-to-wet ratio is 20–25%.
Step 7: Dry and Cure — Don't Rush This
This is where most home growers leave quality on the table. A rushed dry produces harsh, grassy-tasting weed regardless of how well you grew it.
Drying
- Temperature: 60–65°F (15–18°C)
- Humidity: 55–60% RH
- Duration: 7–14 days — aim for the longer end. If stems snap cleanly (not bend), they're ready.
- Hang branches upside down in complete darkness with gentle airflow (a small circulating fan, not blowing directly on buds).
- Check daily for mould — if RH climbs above 65%, run a small dehumidifier.
Curing
- Once dry, trim (if you dry trimmed) and pack buds loosely into glass mason jars — fill to about 75% capacity.
- For the first 14 days, open jars for 5–10 minutes twice daily. This "burping" releases CO₂ and excess moisture. If RH inside the jar reads above 70%, leave lids off for 30–60 minutes.
- Target 60–65% RH inside jars. Drop a 62% Boveda or Integra Boost pack into each jar to maintain this automatically.
- Store jars in a cool, dark place — 60–65°F (15–18°C). Light and heat degrade cannabinoids and terpenes fast.
- After 2 weeks, reduce burping to every 2–3 days, then weekly. By week 4–6, you'll notice a significant improvement in flavour and smoothness. By week 8, you're smoking properly cured weed.
Use the dry & cure timer to track your cure dates and get reminders when to burp and when your jars hit optimal RH — especially useful if you're running multiple harvests at once.
Common mistake: Opening jars too infrequently in the first two weeks. CO₂ buildup creates off-flavours. Set a daily alarm for the first 14 days and actually open every jar.
Troubleshooting: The Most Common Problems
- Yellowing leaves in veg: Usually nitrogen deficiency (lower leaves go yellow, progresses upward) or pH lockout. Check runoff pH first — if it's drifted outside 6.0–7.0 (soil) or 5.5–6.5 (coco/hydro), fix pH before adding more nutrients.
- Purple/red stems in veg: Often genetic, but can indicate phosphorus deficiency or cold temps at night. Check temps before supplementing.
- Slow stretch in early flower: Light intensity or temperature may be too low. Check your VPD and make sure you're hitting at least 700 µmol/m²/s.
- Powdery mildew (white fuzzy patches on leaves): RH too high in flower. Drop humidity below 50%, improve airflow between plants, and apply a diluted 3% hydrogen peroxide foliar spray in the lights-off period.
- Bud rot: Core of bud turns brown and mushy. Usually hits dense colas in humid, low-airflow conditions. Cut out affected area immediately and drop RH below 45%. Don't harvest wet.
How to Grow Good Weed Indoors: Quick Reference Checklist
- Set up environment: 75–82°F day temp, 55–70% RH in veg, 40–50% RH in flower, VPD 0.8–1.6 kPa
- Choose a quality LED — target 600–900 µmol/m²/s PPFD at canopy in flower
- Germinate in moist media, 77–80°F, no nutrients until second node
- Veg on 18/6, start nutrients at 25–50% strength, pH soil at 6.3–6.8
- Train with LST and/or ScrOG from node 4–5
- Flip to 12/12 when canopy is full, ramp P/K, cut nitrogen
- Harvest at 70–90% cloudy trichomes, 10–20% amber
- Hang dry at 60–65°F / 55–60% RH for 7–14 days until stems snap
- Jar cure with daily burping for 14 days, then weekly — minimum 4 weeks total
That's the full cycle. Get the environment right, feed correctly for each stage, train hard in veg, don't harvest early, and don't rush the cure. Every gram of attention you put into those four areas pays back in the jar.