TL;DR: A cannabis grow diary is the single most powerful tool for improving your yields run after run. Log your environment (temp, VPD, EC, pH), daily observations, training moves, and feed changes by growth stage. Cross-reference that data at harvest, and you'll know exactly what to fix next time. This guide walks you through every section of a grow diary — from seed to jar — with real numbers, SVG diagrams, and links to tools that automate the tedious parts.
Why Your Cannabis Grow Diary Is Worth More Than Any Nutrient Brand
Every experienced grower will tell you the same thing: the second grow is always better than the first, and it's not because they bought better genetics. It's because they remembered what went wrong. A cannabis grow diary is a structured memory. It captures the decisions you made, the problems you spotted, and the environmental conditions your plants lived in — day by day. Without it, you're guessing. With it, you're iterating.
Most growers start casual — a few photos, a sticky note about pH. But a real diary has sections. It has numbers. It has a before-and-after structure that lets you compare run 3 to run 7 and actually understand why yield went up 40g. That's what this guide builds for you.
Setting Up Your Cannabis Grow Diary: The Core Sections
Structure your diary into five zones. Use a notebook, a spreadsheet, or a dedicated platform like Grow Guide's grow schedule planner — what matters is consistency, not the medium.
1. Grow Setup Page (Fill This Once Per Run)
- Strain: Name, seed bank, photoperiod or auto, expected flower time. (See active grows for Wedding Cake, Gorilla Glue #4, or your specific strain.)
- Grow space: Tent dimensions (e.g., 1.2m × 1.2m × 2m), medium (coco, soil, DWC), pot size
- Light: Model, wattage, distance-to-canopy at start, target PPFD (300–400 µmol/m²/s for seedlings, scaling to 800–1,000 for late veg/flower). Use the grow light calculator to map your canopy coverage.
- Nutrient line: Brand, which base and additives you're running
- Target environment: Veg temp 75–82°F (24–28°C), flower temp 68–78°F (20–26°C), VPD targets by stage
2. Daily Log Entries
Each day's entry should take under three minutes. Log: date, day count, lights-on temp, lights-off temp, RH%, VPD, any feed or watering (pH in, EC of solution, runoff pH, runoff EC), plant height, and a one-line observation. That's it. The power is in the pattern, not the prose.
Key numbers to track daily:
- pH in: 6.0–6.5 for soil; 5.8–6.1 for coco/hydro
- EC in: 0.8–1.2 mS/cm seedling → 1.8–2.4 mS/cm late flower
- VPD: 0.8–1.0 kPa seedling, 1.0–1.3 kPa veg, 1.3–1.6 kPa flower
- Runoff EC delta: If runoff EC is >0.5 above your feed EC, you have salt buildup — flush and note it
3. Training & Canopy Log
Every LST tie, topping, defoliation session, or net-weaving gets its own entry with the date, technique, and a photo. This section is what lets you compare your canopy at Day 30 of veg this run versus last run. Note node count when you top. If you're running a SCROG, log net fill percentage weekly.
4. Problem & Fix Log
When something looks off, document it immediately: which plant, which leaves, what pattern, what your environment was that day. If you suspect a deficiency, cross-reference with the nutrient deficiency identifier before you dose anything. Log your diagnosis and what you changed — then log whether it worked 5–7 days later.
The most common entries you'll make here:
- Overwatering: leaves clawing down, soil staying wet past 48 hours → extend dry-back to 30–40% pot weight loss before rewatering
- Nitrogen deficiency: yellowing from bottom up, older leaves → bump N in veg feed, check pH isn't locking it out first
- Nutrient burn: crispy, brown leaf tips → drop EC by 0.3–0.4 and flush if more than 20% of leaves are affected
- Heat stress: leaf edges tacoing upward → check canopy temp, raise light, adjust HVAC
Stage-by-Stage Diary Entries: What to Focus On
Seedling Stage (Days 1–21)
Keep entries brief — there's not much to log but keep humidity at 65–70% RH and temps around 75–80°F (24–27°C). PPFD should sit at 200–300 µmol/m²/s. Note cotyledon health, when the first true node appears, and tap root progress if you're in a clear solo cup. Log the exact date you pot up — this is a key diary milestone.
Vegetative Stage (Weeks 3–8)
This is where the diary earns its keep. Log every training event. Note internode spacing — tight nodes (under 2cm) mean your light intensity and distance are dialled; stretched nodes (over 4cm) mean your PPFD is too low or your light is too far. Target VPD 1.0–1.2 kPa. Feed EC should ramp from 1.0 up to 1.8 mS/cm by the end of veg. Use the grow schedule planner to map your feed ramp.
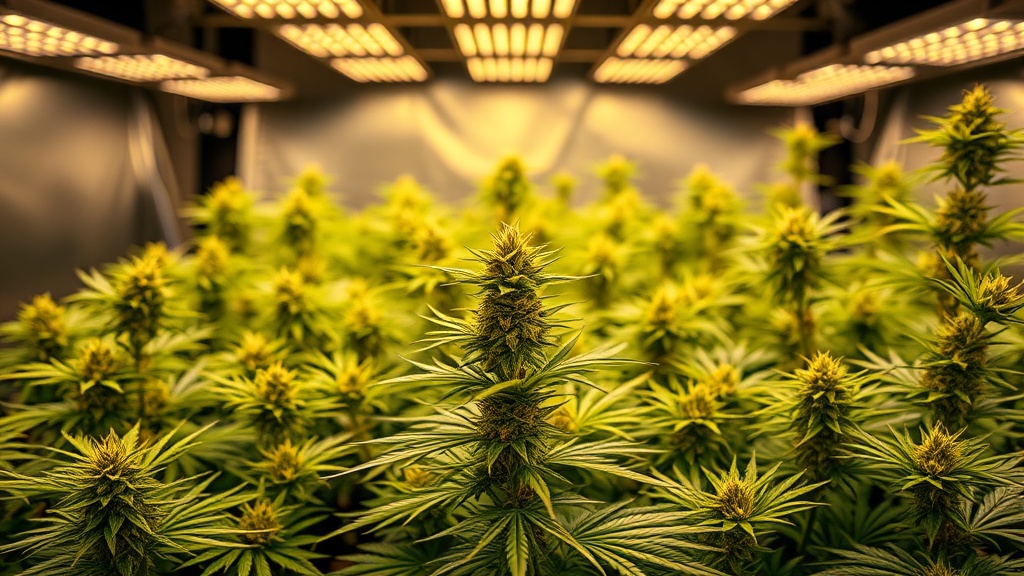
Flowering Stage (Weeks 8–16 depending on strain)
Switch from height/training logging to bud development. Note stretch duration (typically weeks 1–3 of flower). Start logging trichome colour from week 6 of flower onward — clear, cloudy, or amber. At 50–70% cloudy trichomes, you're at peak THC. When amber starts creeping past 20%, you're losing THC to CBN. Log the day you start your flush (if using one) and the day you cut.
Feed EC peaks at 2.0–2.4 mS/cm in weeks 4–6 of flower, then drops during the final 2 weeks. Phosphorus and potassium dominate — nitrogen should be low. Log any signs of mid-flower nitrogen toxicity (clawing dark green leaves) and back off N immediately.
Harvest Entry
The harvest entry is one of the most important in your entire diary. Log: harvest date, day count from flip, total wet weight per plant, trichome ratio at cut (e.g., "70% cloudy, 15% amber, 15% clear"), and any notes on bud density, smell profile, and colour. Estimate expected dry yield using the yield calculator — then compare it to your actual dried weight in 10 days. That delta tells you a lot about your dry conditions.
Logging the Dry and Cure in Your Cannabis Grow Diary
Most growers abandon their diary after the chop. Don't. The dry and cure phase has as much impact on final quality as any nutrient decision you made in week 6 of flower.
Drying log: Record room temp and RH every day. Target 60–65°F (15–18°C) and 55–60% RH. Log stem snap progress — small stems should snap (not bend) around day 7–10, thicker branches around day 10–14. If your RH drops below 50%, your dry is too fast and terps are escaping. If it stays above 65%, mold risk spikes — log it and respond.
Curing log: Date of jar-up, final dry weight (compare to wet weight for shrinkage ratio — typically 75–80% water loss), jar RH with a Boveda or hygrometer. Log your burping sessions — twice daily for the first week, then once daily for week two, then every few days from week three onward. Note smell changes: ammonia smell means it went into jars too wet (below 62% RH in jar target). Use the dry & cure timer to track your cure duration automatically.
Making Your Diary Work Between Grows
The grow diary only pays dividends if you do a post-harvest review. After each run, sit down with your log and answer these four questions:
- What was my average VPD during weeks 4–8 of flower, and was it in range (1.3–1.6 kPa)?
- Did my runoff EC spike above my feed EC during flowering? If so, when — and did I address it?
- What was my actual grams per watt? (Use the yield calculator to benchmark against your light wattage.)
- When did I first see the problem I eventually identified — and how many days before I fixed it?
That last question is the growth driver. Most growers notice something odd on day 3 but don't act until day 10. Your diary will make that visible. By run 4 or 5, you'll be catching problems on day 1 because you know your plants' baseline. That's the compounding return on a cannabis grow diary.
Tools That Plug Into Your Cannabis Grow Diary
A diary is most powerful when paired with calculators that turn your logged numbers into decisions:
- Grow Light Calculator — input your tent size and target PPFD to find the right fixture or hanging height. Log the result in your setup page.
- Yield Calculator — benchmark your expected vs. actual grams per watt each run.
- Nutrient Deficiency Identifier — when you log a problem entry, run symptoms through this tool before making a feed change.
- Dry & Cure Timer — log your chop date and get automated reminders for burping schedules and cure milestones.
- Grow Schedule Planner — build a stage-by-stage feed and training plan to run alongside your daily log.
Final Word
Start your cannabis grow diary today — even if your plants are already in week 4 of flower. Back-fill what you can remember (strain, flip date, your light setup, any problems you've seen) and start logging from now. An incomplete diary from week 4 onward is worth ten times more than a perfect diary you plan to start next run. The data you collect over the next eight weeks will directly inform your next grow — and every grow after that gets sharper, heavier, and more consistent. That's the whole point.